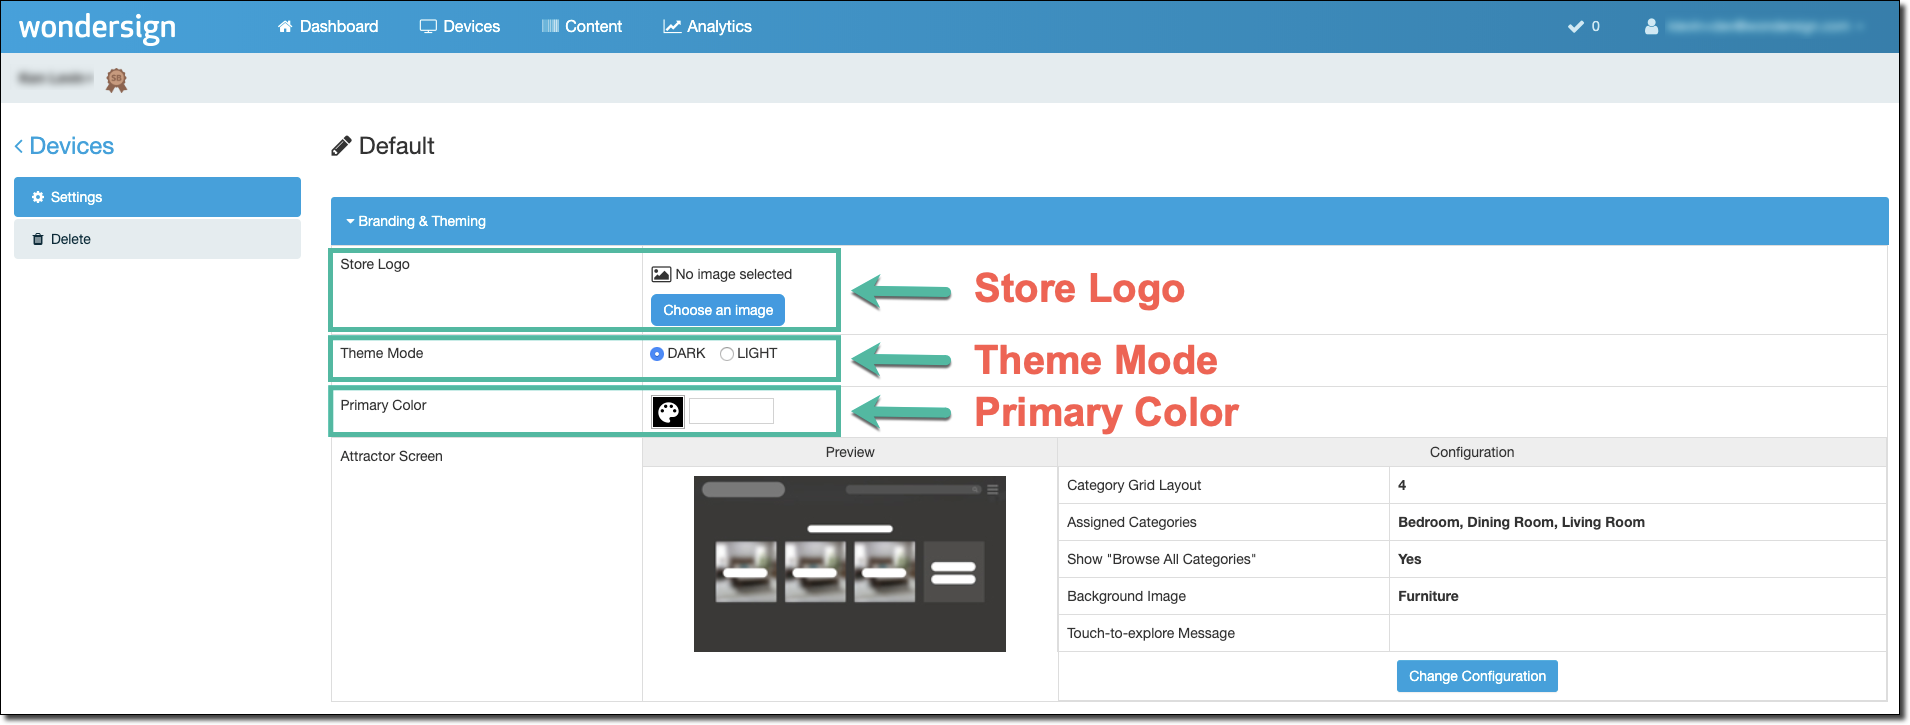
Branding & Theming
Within the Branding & Theming section you can upload your Store Logo, select a Theme Mode, set the Primary Color, and format the Attractor Screen.
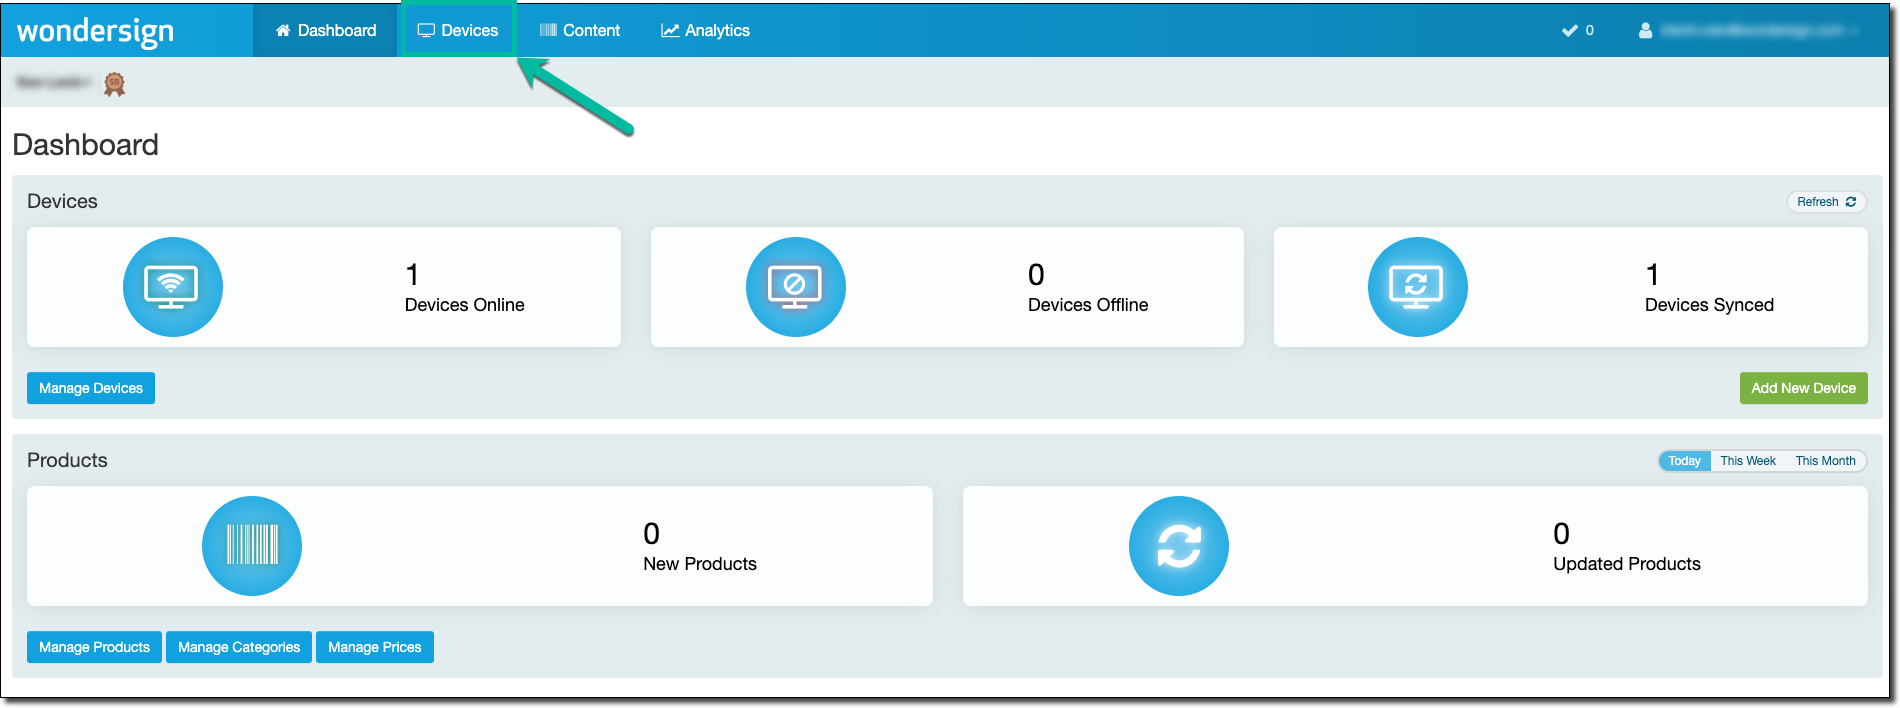
- Log into the Catalog App Manager (CAM).
-
Click Devices in the top navigation menu.
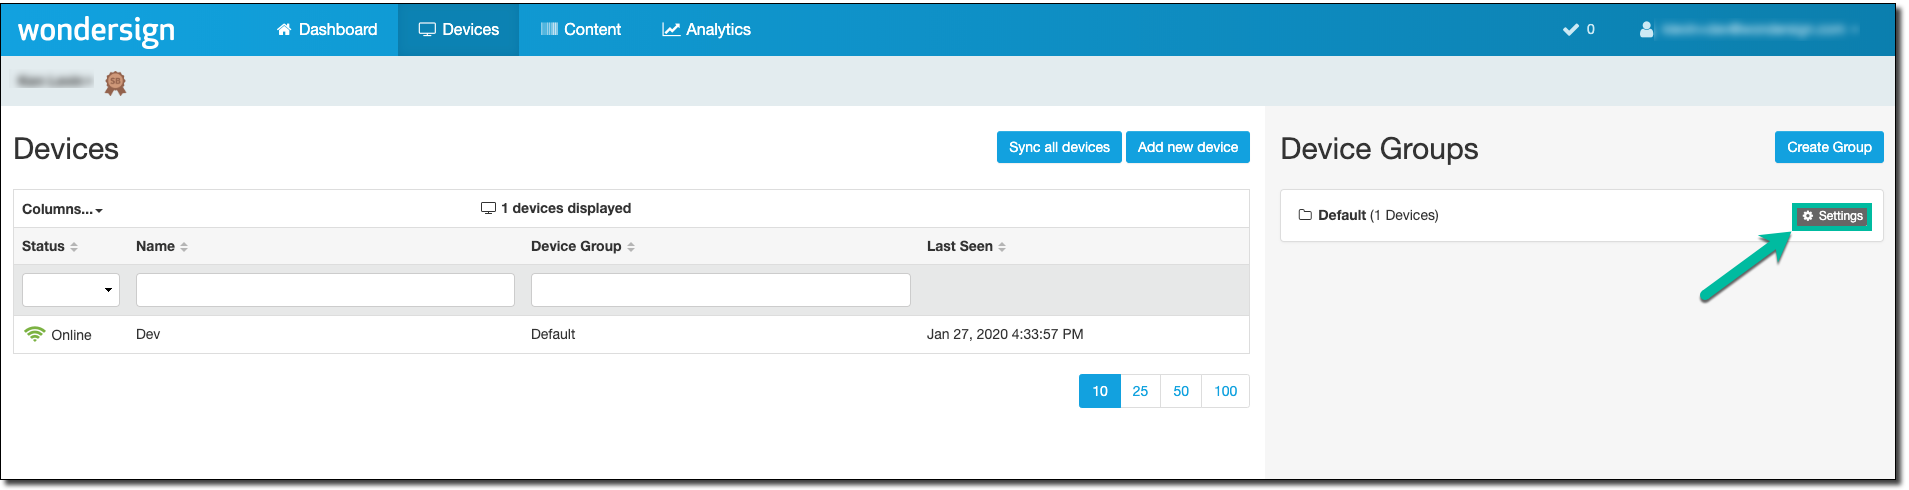
- Click Settings in the Device Groups section.
- Click the Branding & Theming section to expand it.
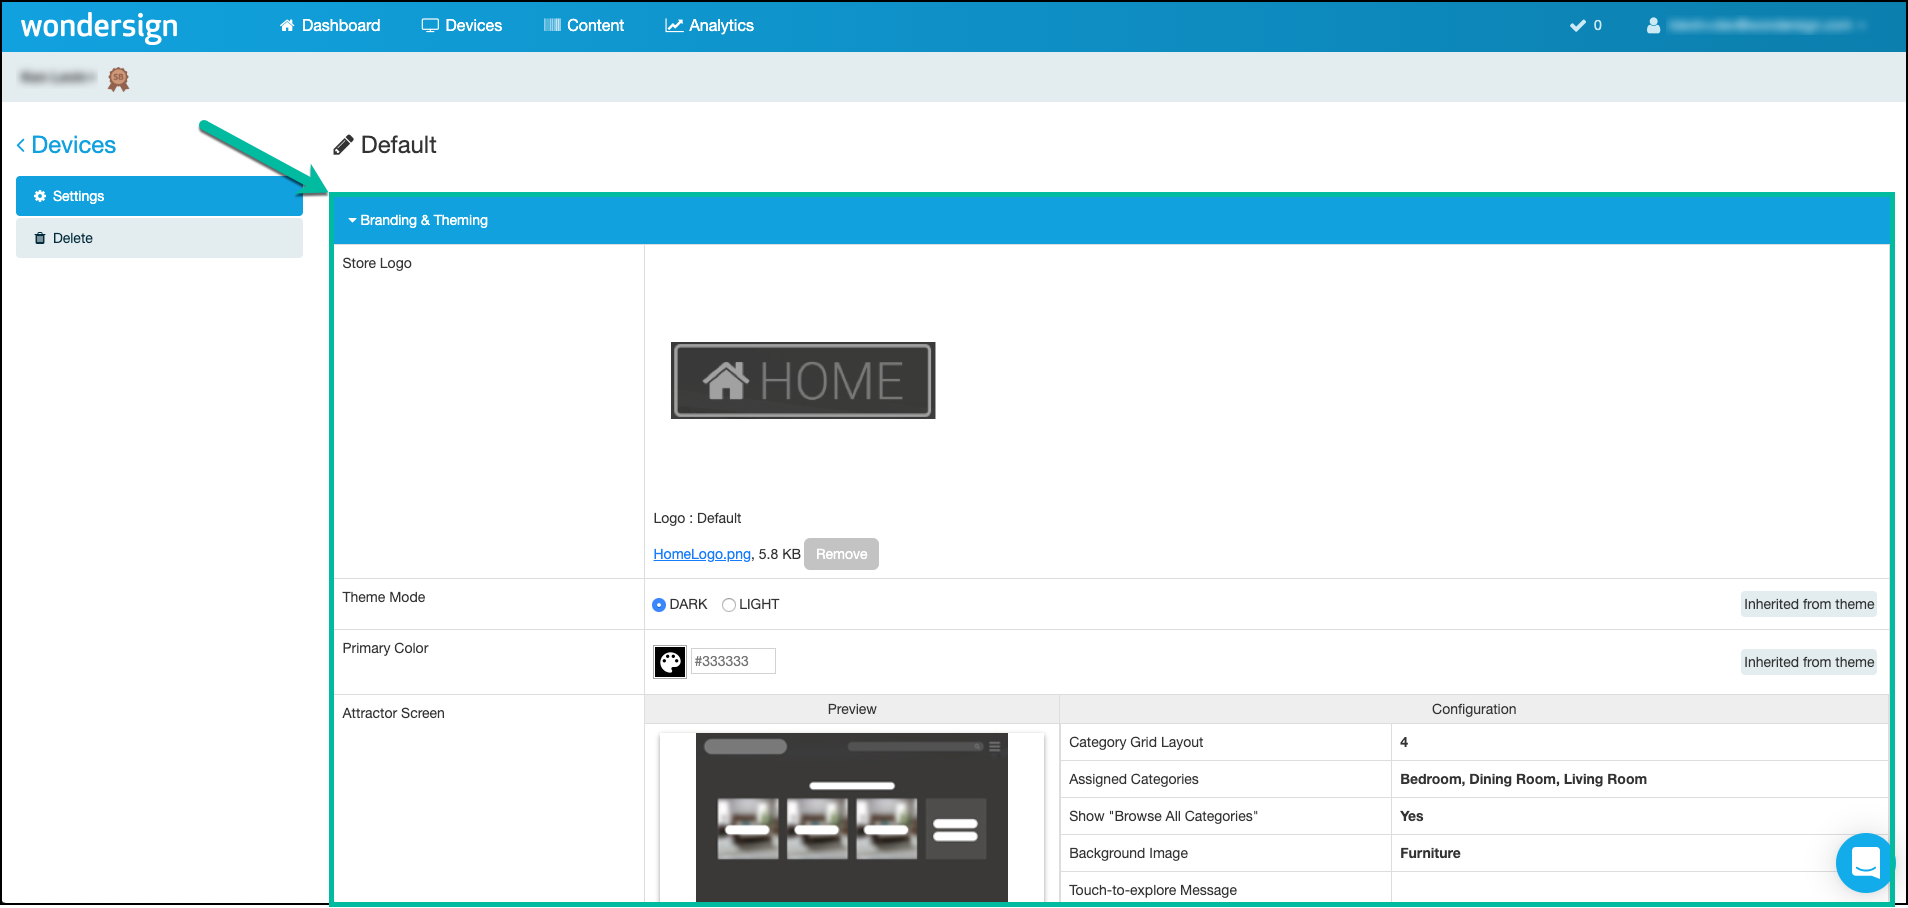
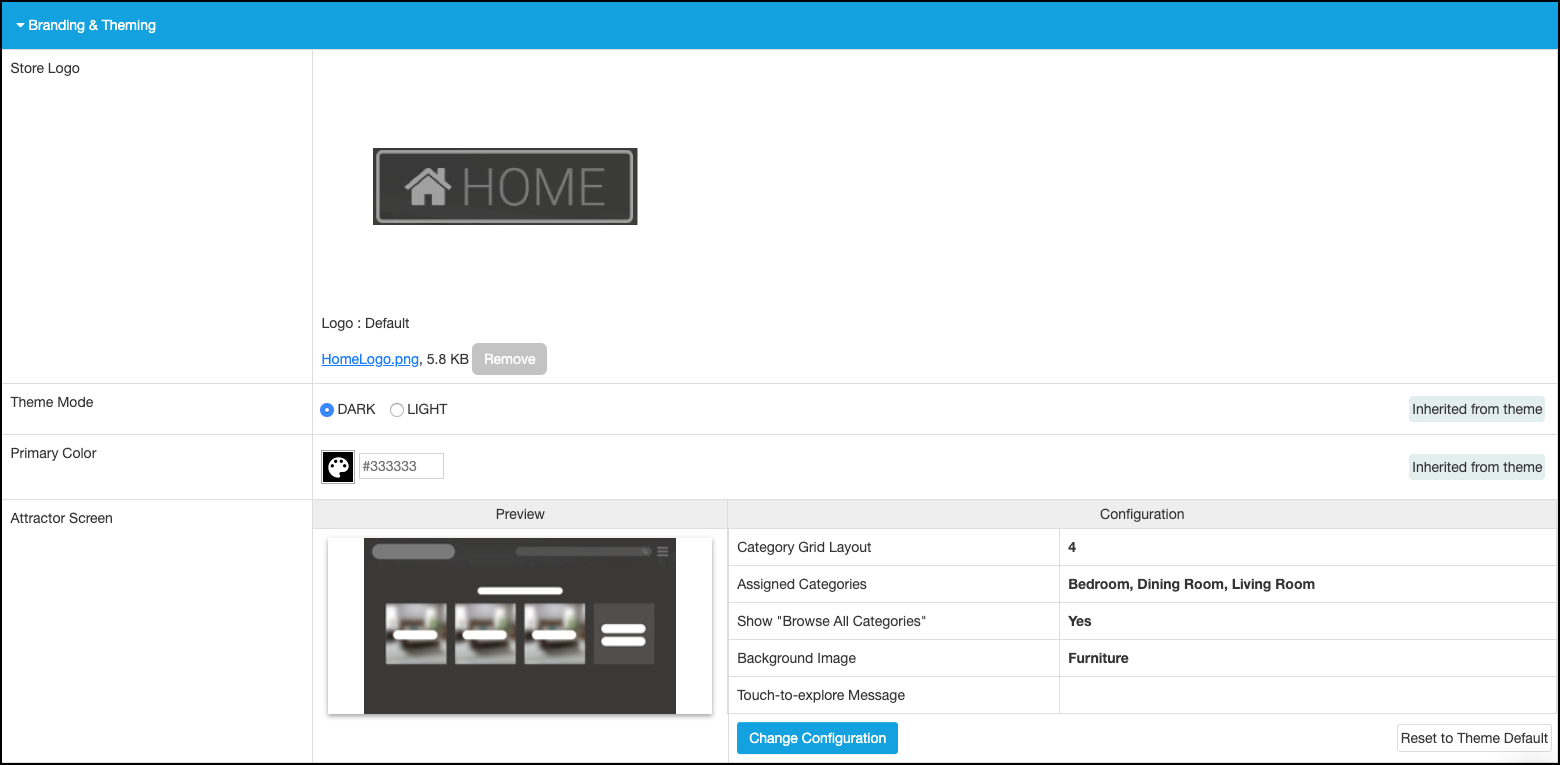
Store Logo
You have the option to upload your store logo that will appear on the upper left side of the Catalog Kiosk app. The store logo will act as a Home button and return you to the attractor screen from any screen in the app.
To upload your store logo, click the Choose an Image button.
If a store logo has not been uploaded, the system will use the default Home icon shown below:

See article How to Add Your Logo for more information on adding a logo to your Catalog Kiosk app.
You can continue to make changes but you will need to save changes and sync your devices before they will take effect.
Theme Mode
The Theming section allows you to select between a DARK theme and a LIGHT theme. The DARK theme is enabled by default. To switch to the LIGHT theme, click the LIGHT radio button in the Theming section.
You can continue to make changes but you will need to save changes and sync your devices before they will take effect.
Please note:
- If the DARK theme is selected, changing the Primary Color will update the background color, button color, and the navigation bar color.
- If the LIGHT theme is selected, changing the Primary Color will update all text and buttons/icons to that color.
.png)
Primary Color
The Primary Color can be used to customize your Catalog Kiosk appearance. To change the Primary Color click the color palette icon and make the appropriate selection. If you know the HEX code value of the desired color, you can enter the HEX code value in the text field next to the color palette icon.
You can continue to make changes but you will need to save changes and sync your devices before they will take effect.
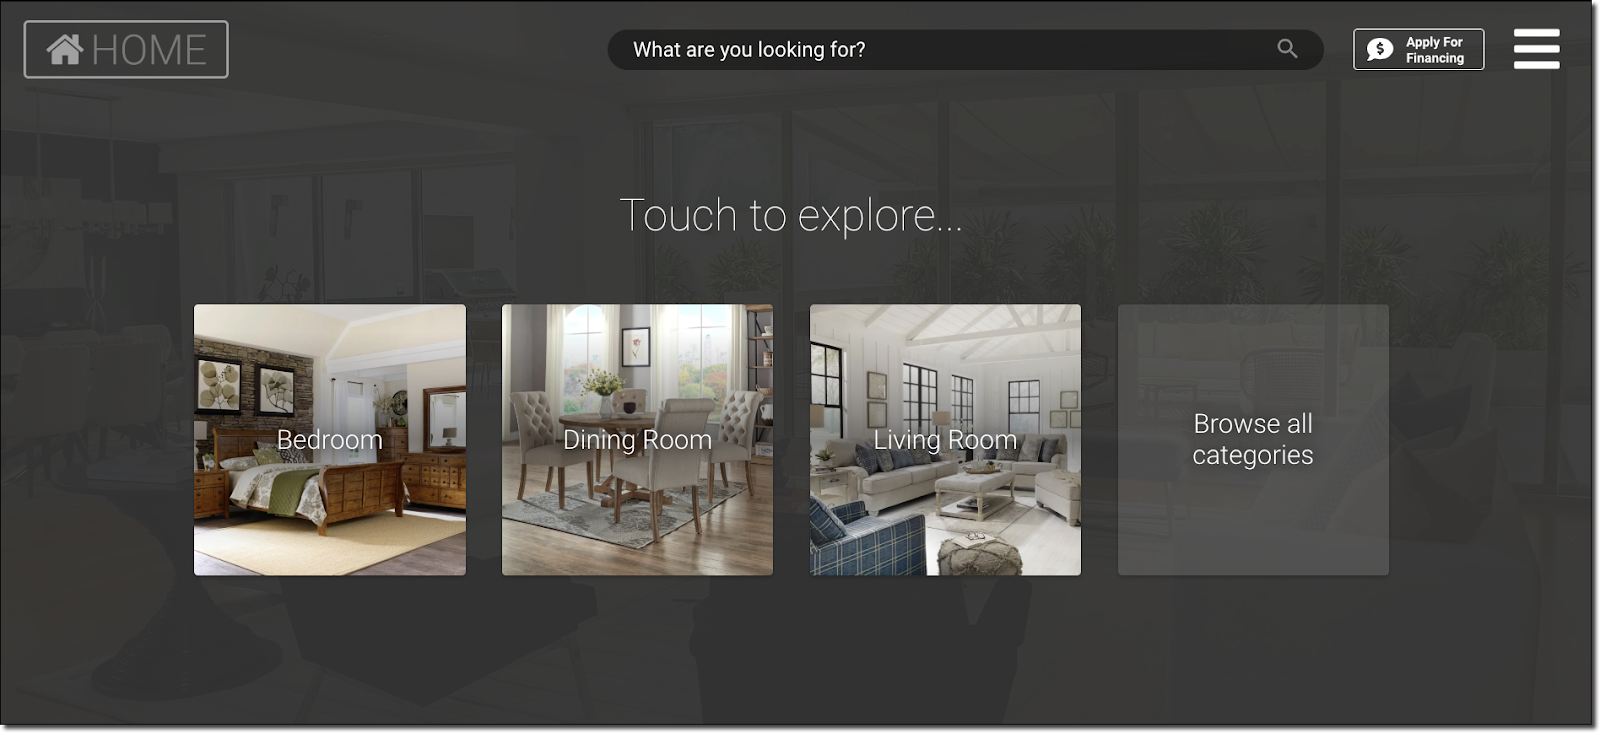
Attractor Screen
The Attractor Screen is the first screen your guests will see when they walk up to the Catalog Kiosk app on an in-store device. The Attractor Screen will also be displayed when the device times out.
Click the Change Configuration button to open the Attractor Screen Configuration window.

Follow the steps below to configure the Attractor Screen.
1. Choose a Category Layout
You can select between 1 and 6 tiles that will be displayed on your Attractor Screen. Each tile can be assigned to a specific category with an option for the last tile to allow your guests to browse all categories. The layout of the tiles is based on the number of tiles that are selected. Click the layout with the desired number of tiles to select it. A blue frame indicates which tile layout is currently selected.
By default, the Attractor Screen is set to 4 tiles with the 4th tile assigned to the Browse All Categories option.
2. Assign Tiles to Categories
Assign each tile to a category by typing in the category name. As you type, the system will predict the category based on the available categories in your account.
When a customer taps a tile, they will be taken directly to the category assigned to that tile.
Click the box next to Assign last tile to "Browse All Categories" to turn the last tile into a general "browse all categories" tile.
3. Choose a Background Image
Choose a background image for the attractor screen by clicking on the appropriate image. The background image will be displayed with low opacity behind the category tiles.
4. Configure the "Touch-to-explore..." Message
The default call-to-action message on the attractor screen is "Touch to explore...". This message can be changed by clicking the text field and entering a custom message. It is recommended to keep the call-to-action short and simple.
5. Click the Apply Button

You can continue to make changes but you will need to save changes and sync your devices before they will take effect.
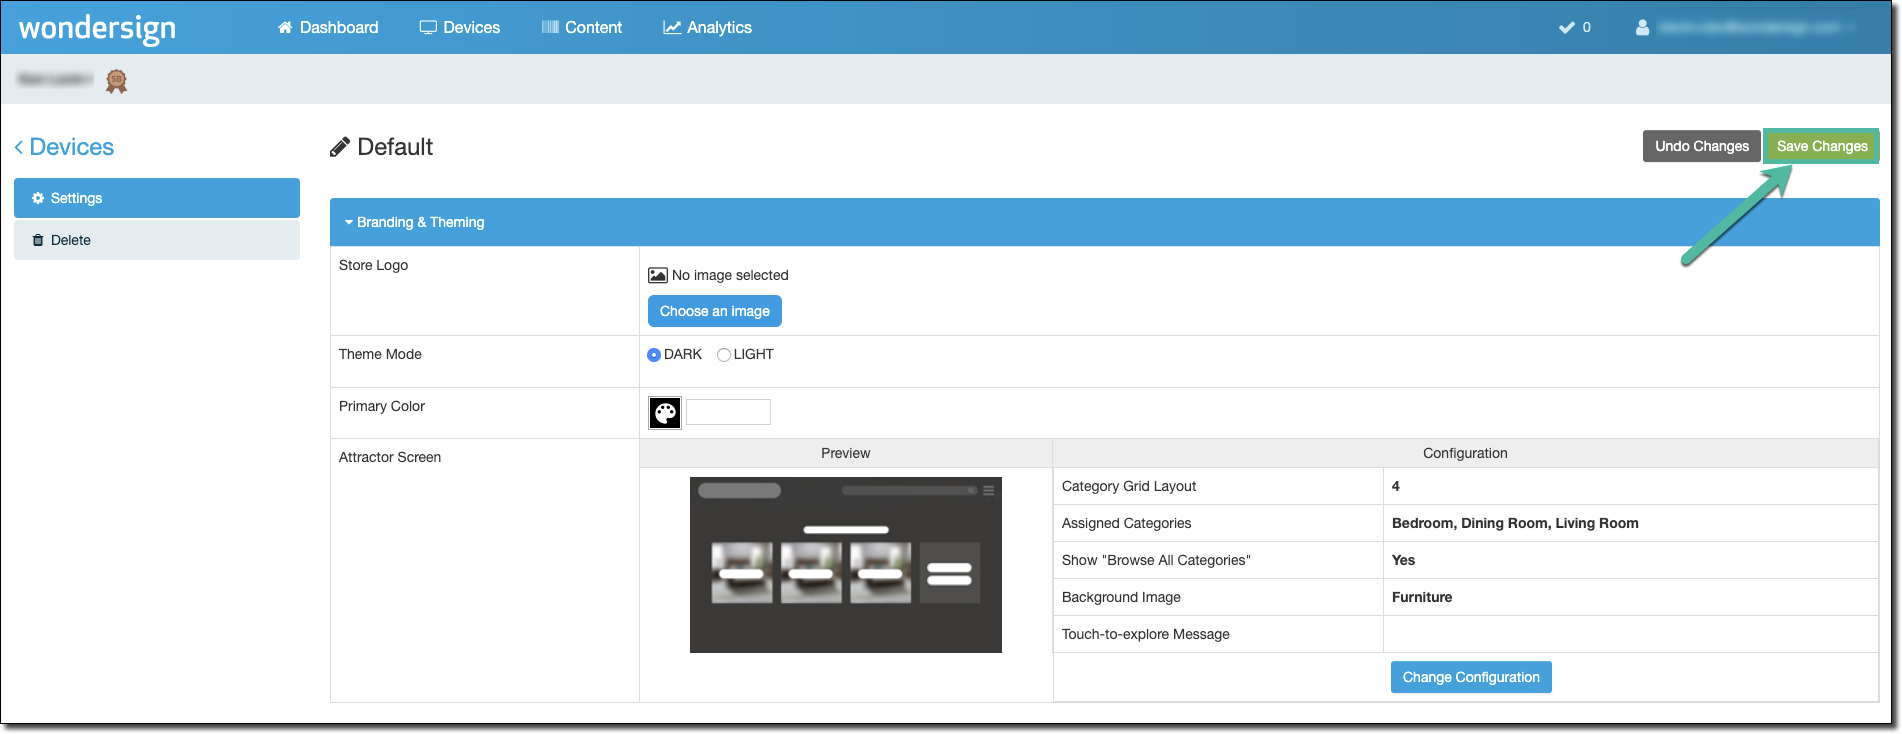
Save Changes
Click the Save Changes button in the top right corner to save any changes that have been made.
Sync Your Devices
Click Devices on the top menu bar and then click the Sync all devices button.
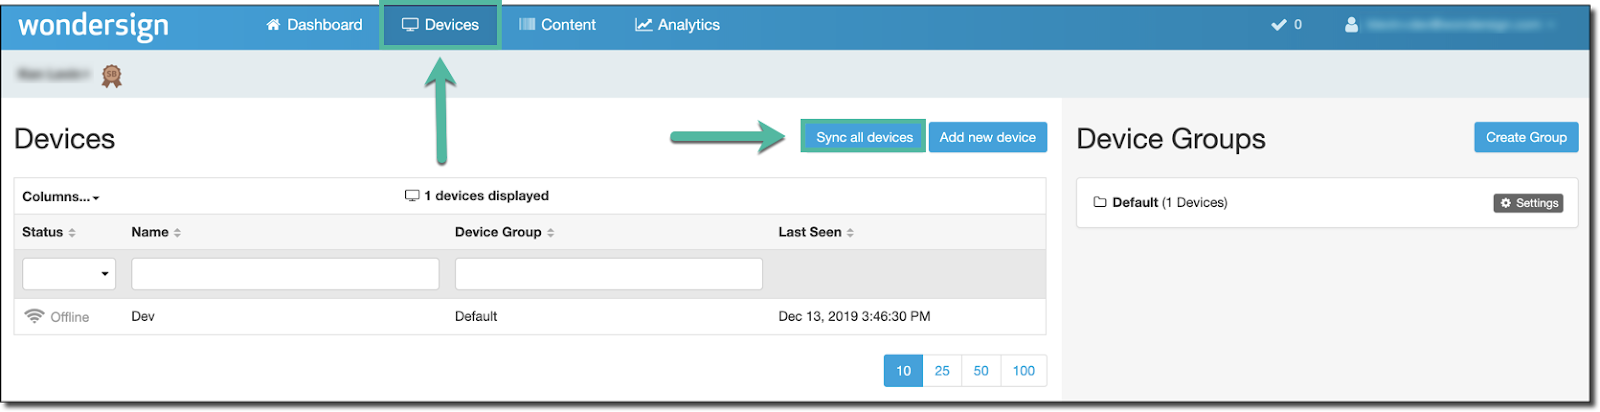
Once the sync is completed (and assuming your devices are online at the time of sync), your guests should now see your new Attractor Screen.
Device Display
Based on the selections made above, the device will display the following.